How to Prepare Your Artwork for Sticker Cut-Lines:
A Step-by-Step Guide
Creating custom stickers is an awesome way to bring your artwork into the physical world. However, getting that perfect, professional white border around your design requires a little bit of preparation.
Whether you are working with a vector logo or a hand-drawn digital illustration, this step-by-step Adobe Illustrator guide will show you exactly how to build a clean, smooth cutting path for your sticker manufacturer.
Step 1: Prepare Your Artwork
Before you begin, gather the design you want to turn into a sticker. You can use various file formats like PNG, PSD, or PDF.
If your artwork is already vector-based: You’re ahead of the game! Skip straight to Step 3.
If your artwork is a bitmap (like a PNG): Stay right here. We need to convert it into a vector base first so Illustrator can read its outlines.
Step 2: Make Your Base Vector
To create a sticker cut-line from a bitmap image, we need a solid vector silhouette of your design.
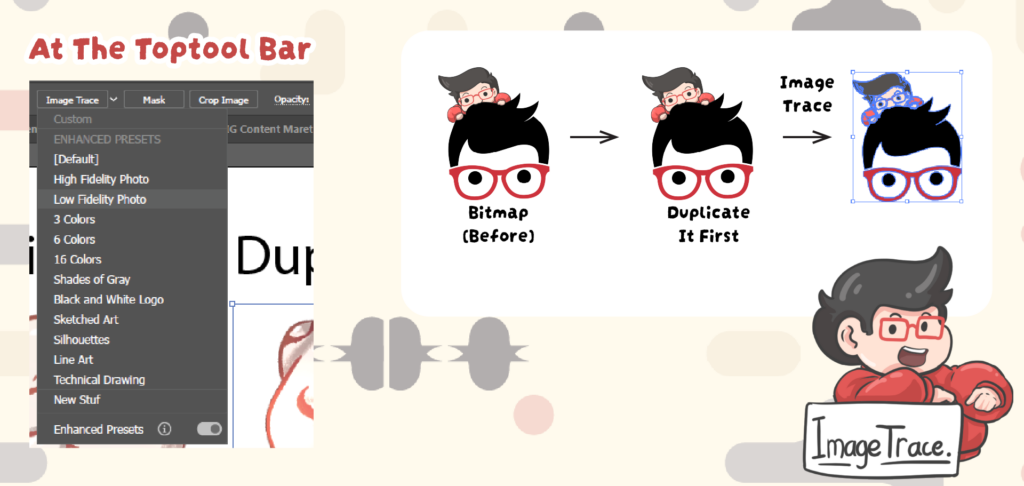
Duplicate Your Artwork: Make an extra copy of your original design layer. This ensures your original artwork remains completely untouched while you generate the cut-line.
Use Image Trace: Select your duplicated artwork and open the Image Trace panel (or select it from the top control bar). Choose a preset (like Low Fidelity Photo or Silhouettes) that captures the solid outline of your design.
Expand: Once traced, click Expand in the top menu to turn the trace into editable vector shapes.
Step 3: Create the Offset for Your Cut-Line
Now it’s time to build that clean border margin around your sticker.
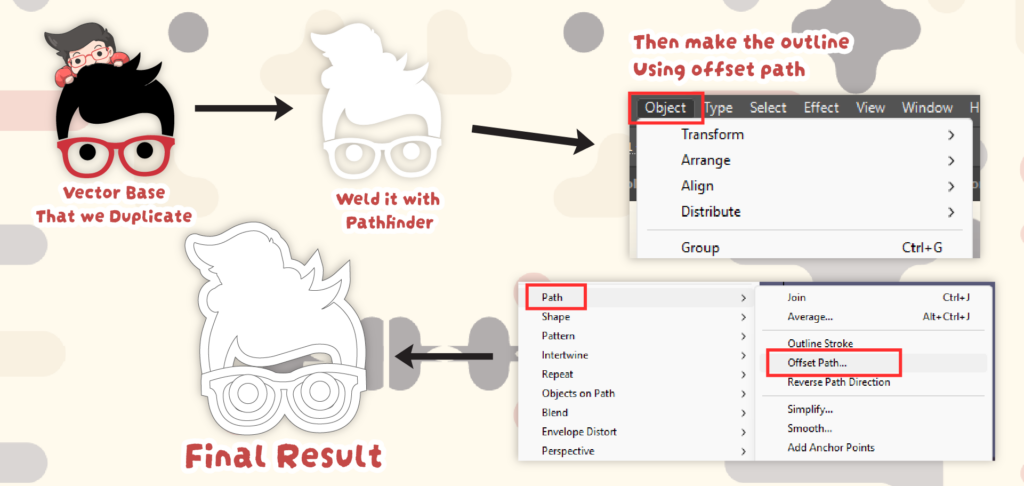
Merge the Artwork: If you just used Image Trace, use the Pathfinder panel and click Unite (Merge) to combine all the traced pieces into one single, unified form.
Make Offset Path: With your silhouette shape selected, navigate to:
Object > Path > Offset Path…
Adjust the Margin: Enter an offset value to expand the outline slightly outside your artwork. This creates the exact safety margin you want between your design and the physical cutting edge.
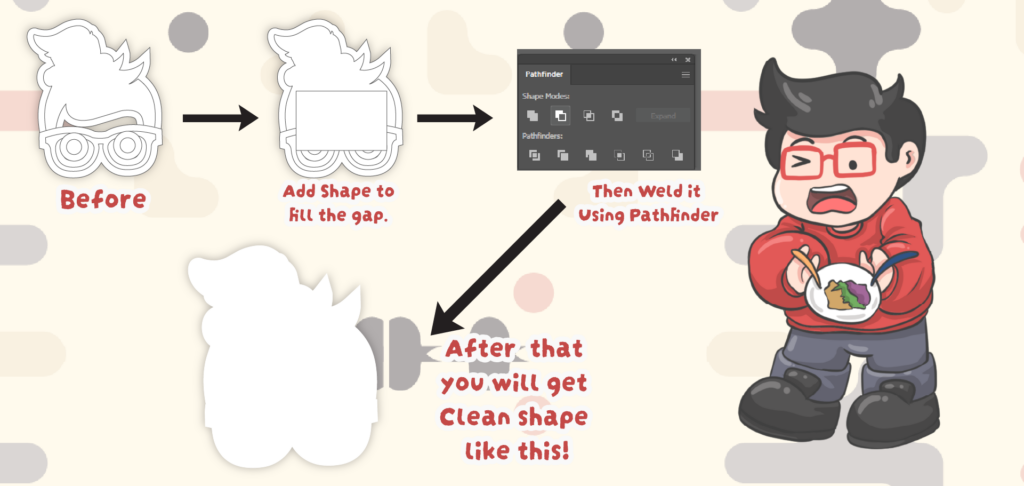
Step 4: Clean Up Holes and Merge Again
Sometimes, creating an offset path leaves behind accidental gaps, negative spaces, or multiple overlapping shapes.
Unite Shapes: Open your Pathfinder panel again and click the Unite button to ensure the entire cut-line is one single, continuous path.
Fill Inside Holes: Check the interior of your silhouette. If there are any hollow “holes” inside the shape where you don’t want the sticker machine to cut, fill them in completely with color so the background remains solid white.
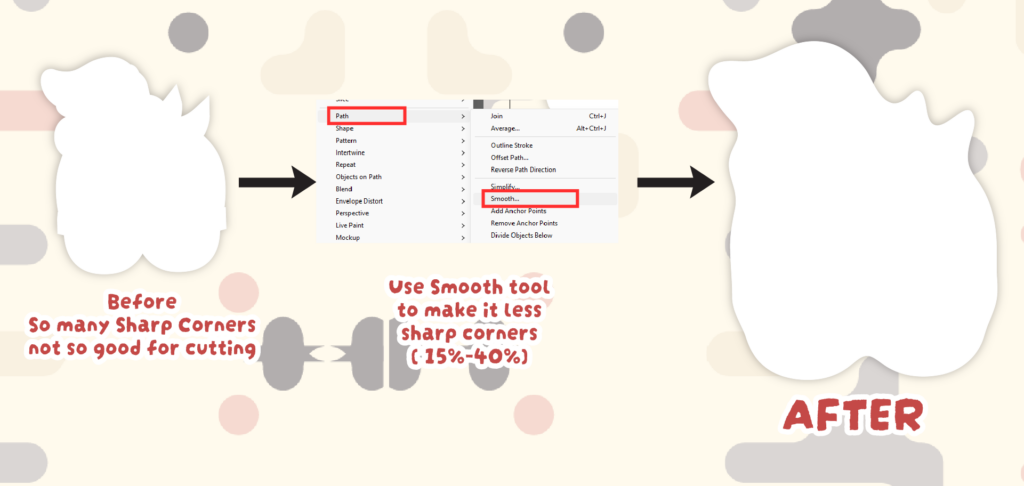
Step 5: Smooth the Cutting Path
Sticker cutting machines prefer smooth curves over thousands of jagged anchor points. Cleaning up your path prevents the blades from snagging.
Select your new silhouette path and navigate to:
Object > Path > Smooth…
Apply a smoothing slider value of around 15% – 30%.
This automatically removes unnecessary anchor points, resulting in a cleaner, more natural curve that cutting plotters can easily trace.
Step 6: Align the Artwork to the Cut-Line
You’re at the finish line! Now we just need to bring your original design and your brand-new cutting path together.
Bring your original artwork layer back to visibility.
Select both your original artwork and your new cut-line silhouette.
Use the Align panel to horizontally and vertically center them perfectly.
Change the fill of your background silhouette to white (or your desired border color) and add a thin stroke if your printer requires a specific spot color line.
Your trimming path is now perfectly positioned, and your sticker file is officially ready for production! Happy printing!