Simple and Easy Way to Prepare your Artwork for Print
Before sending your final files off to the printer, it is highly recommended to outline your text. This simple process turns your typed fonts into solid vector shapes, ensuring your design prints exactly as you intended—without any missing font errors!
Here is how to do it quickly in Adobe Illustrator:
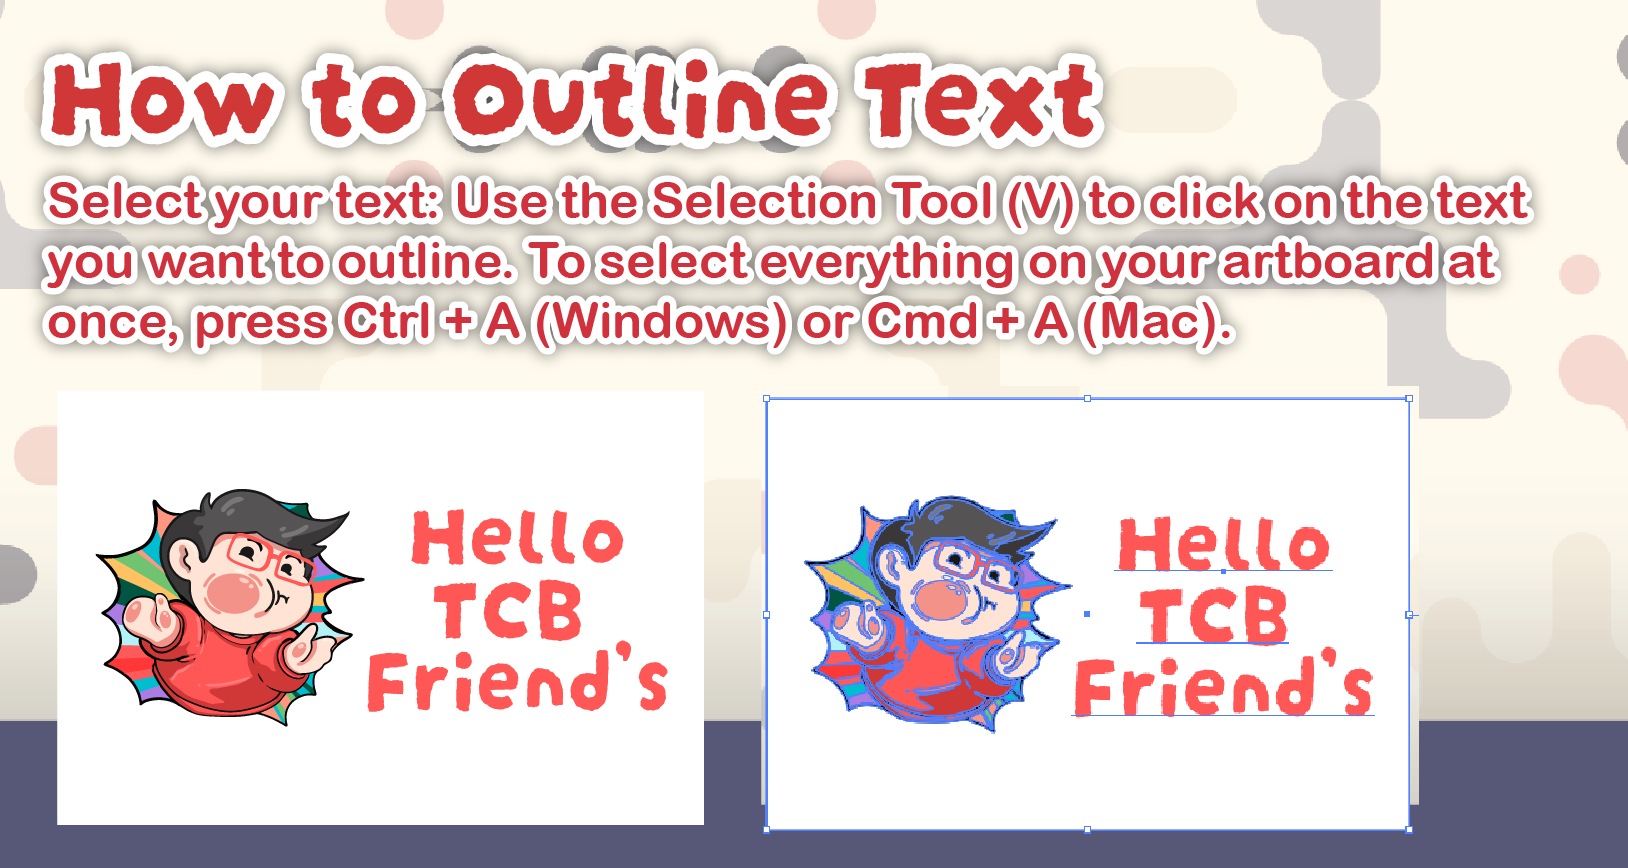
1: Select Your Text
Use the Selection Tool (V) to click on the text you want to outline.
Pro Tip: If you want to select all the text on your artboard at once, simply press Ctrl + A (Windows) or Cmd + A (Mac).
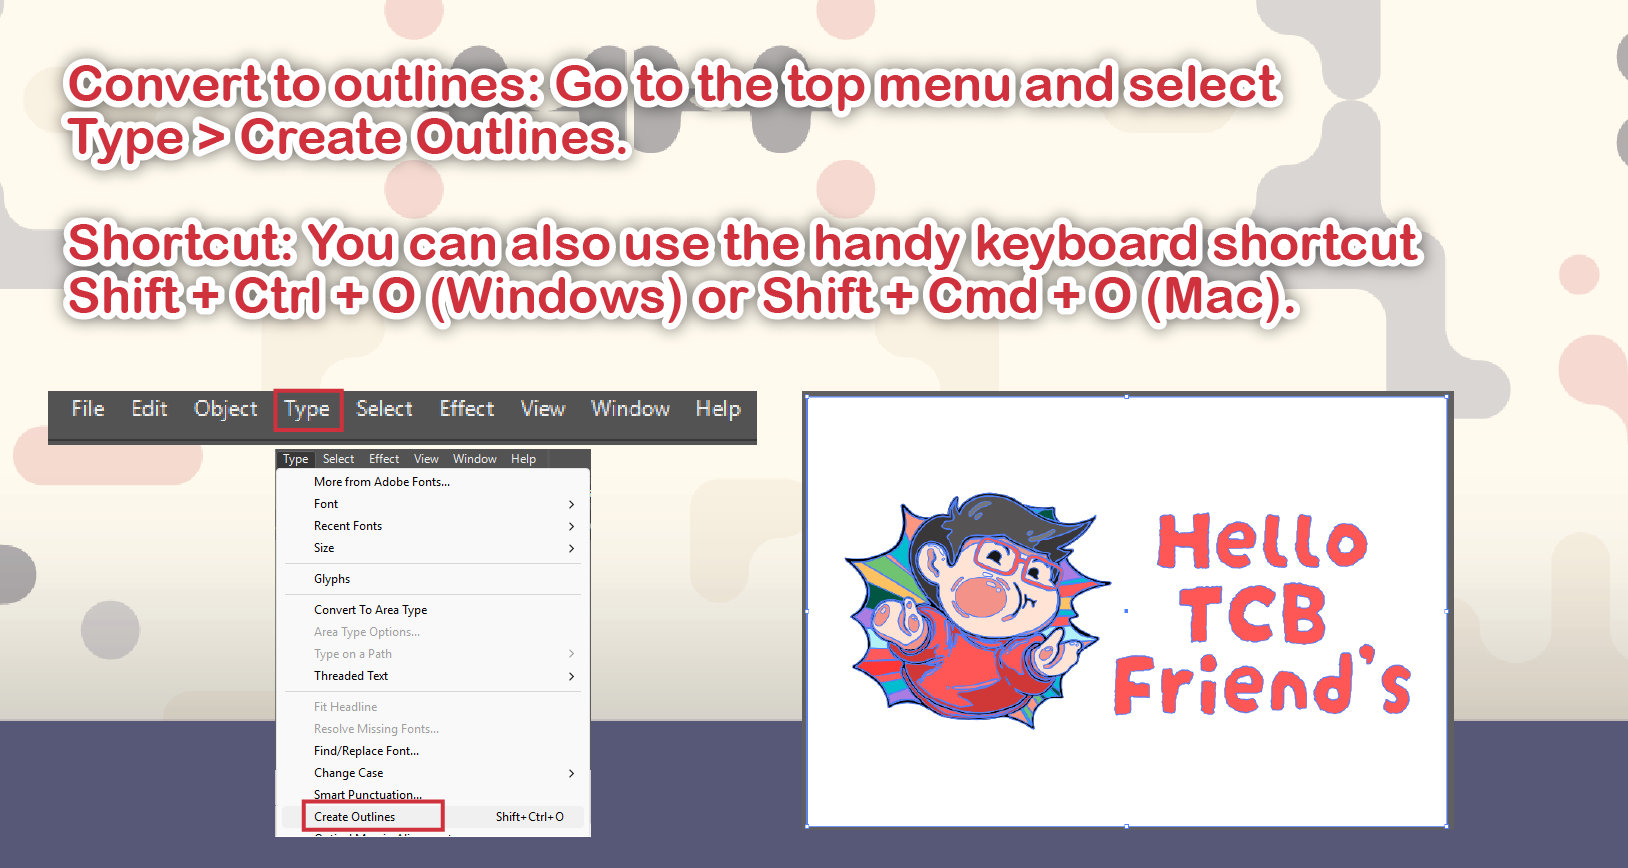
2: Convert to Outlines
With your text selected, navigate to the top menu bar and click: Type > Create Outlines
Handy Shortcut: You can speed up your workflow by using the keyboard shortcut Shift + Ctrl + O (Windows) or Shift + Cmd + O (Mac).
3: You're Done!
Your text is now successfully converted into vector shapes, locking in your design perfectly for print production.
Important Reminder: Once you outline your text, you can no longer edit it with the typing tool. Always remember to save an editable “Working File” before outlining and saving your final “Print Ready” file!