
Adding a proper bleed ensures your final printed product looks professional and flawless. Here is how to easily add a 3mm bleed to an existing design using Content-Aware Fill.
Step 1: Expand the Canvas to 3mm
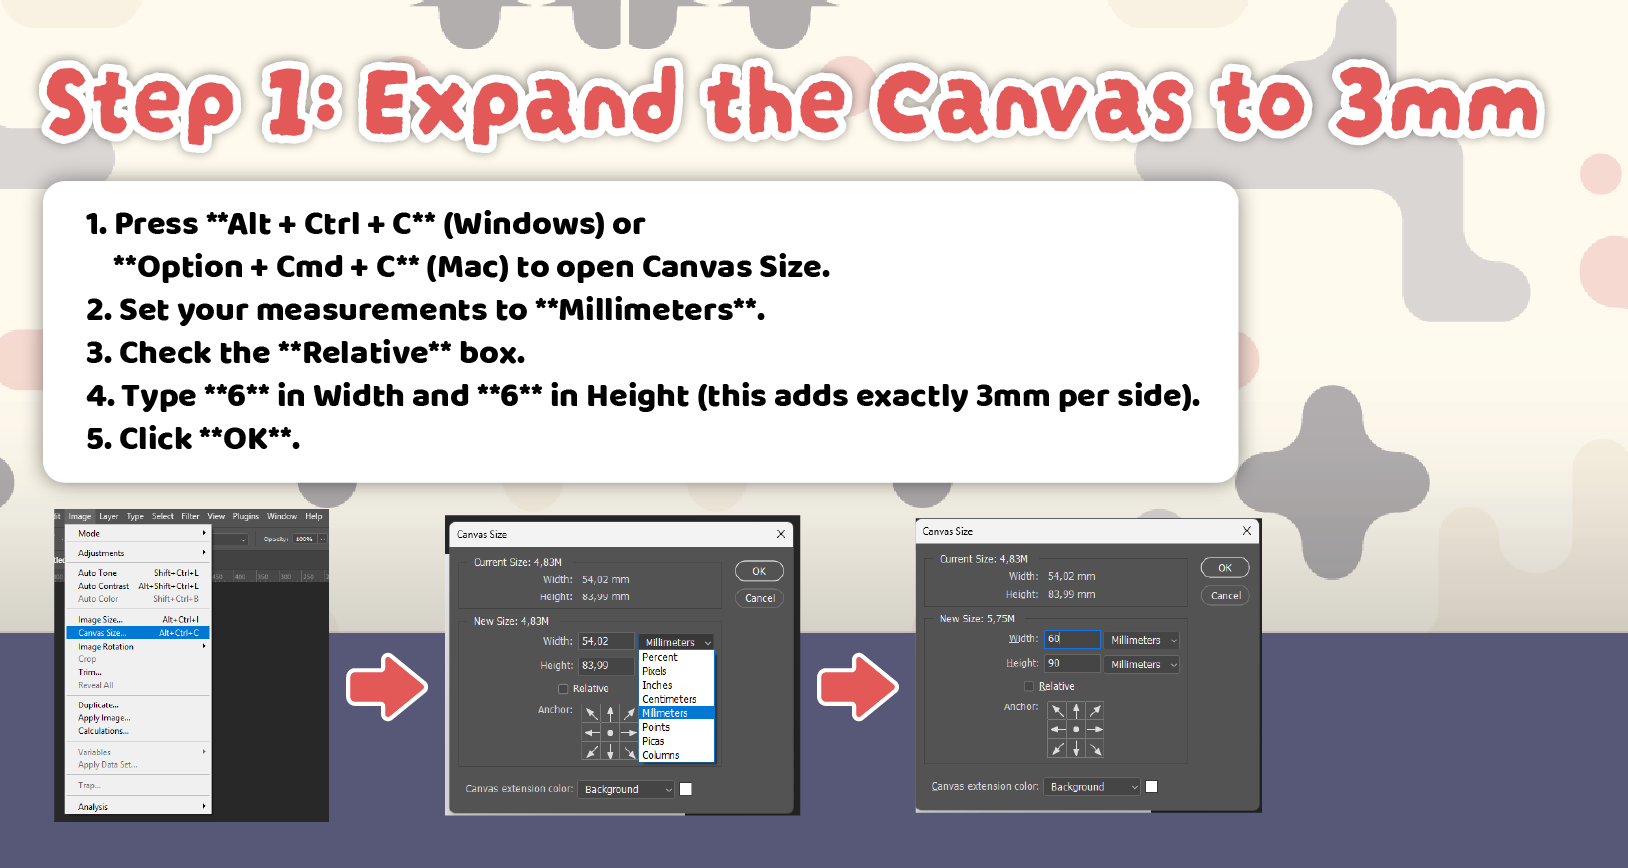
First, we need to create the physical 3mm gap around your artwork.
Press Alt + Ctrl + C (Windows) or Option + Cmd + C (Mac) to open the Canvas Size window.
Set your measurements to Millimeters.
Check the Relative box.
Type 6 in the Width box and 6 in the Height box (this adds exactly 3mm per side).
Click OK.
Step 2: Select the Empty Bleed Area (and overlap slightly)
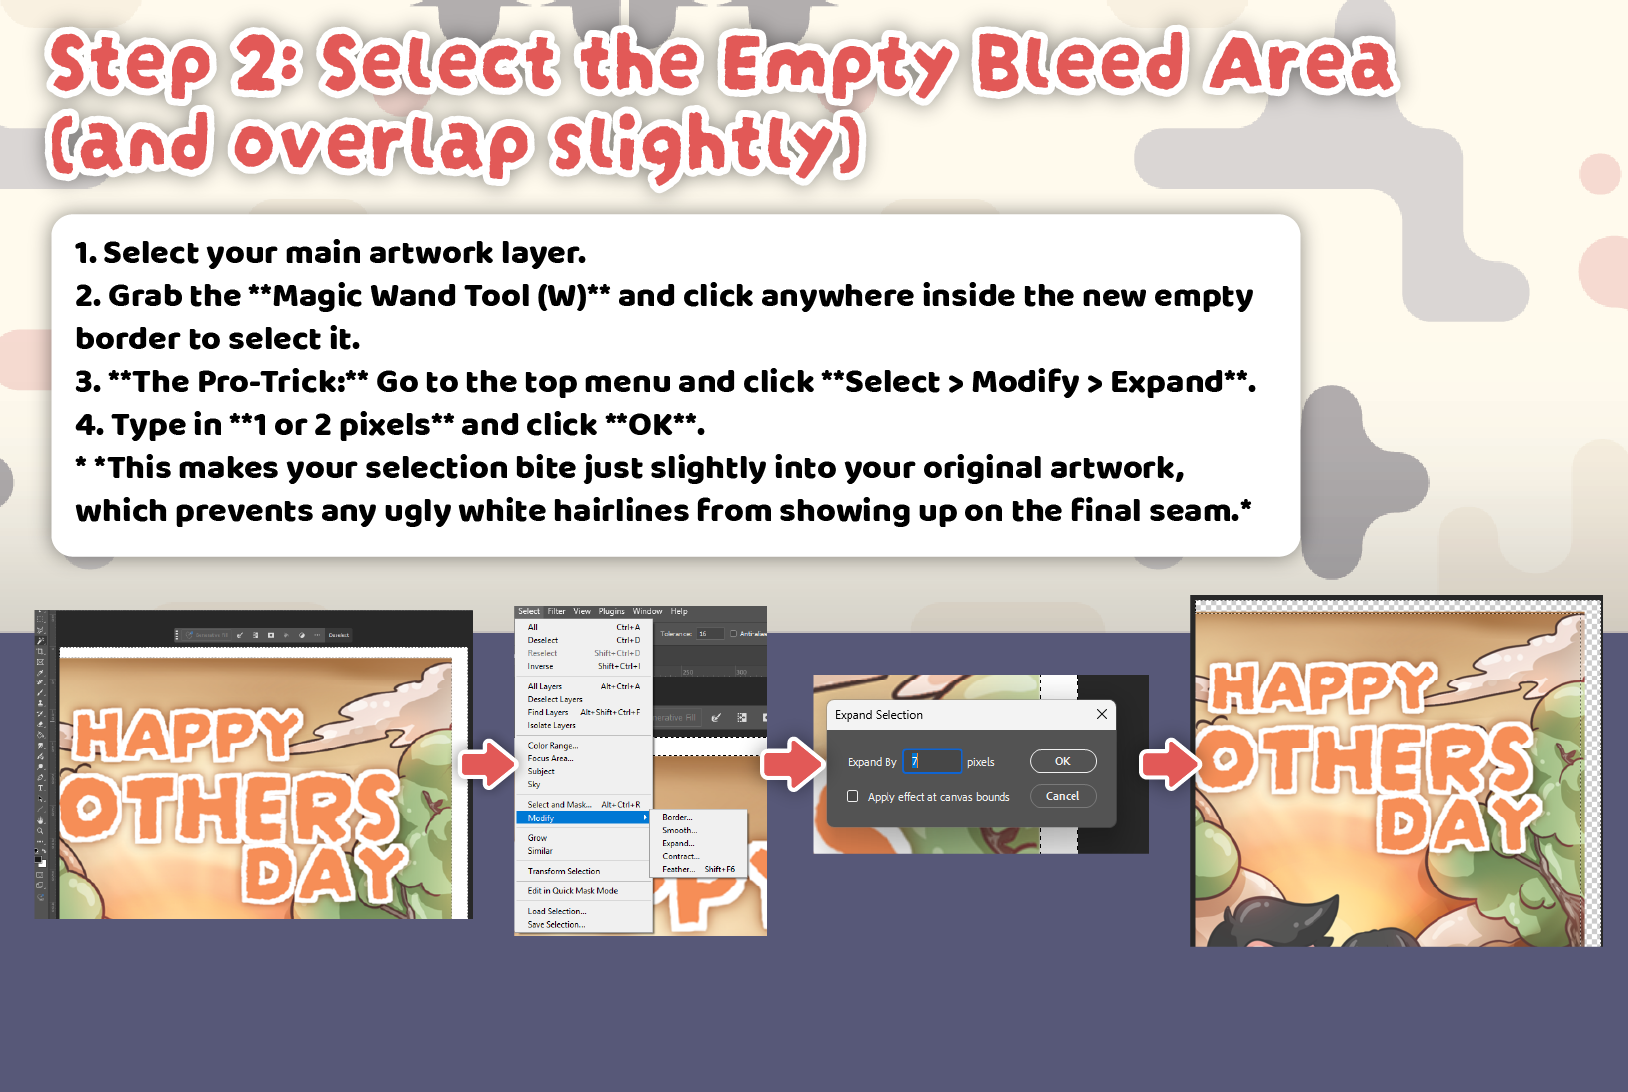
Next, you need to select the new empty border so Photoshop knows where to generate the new background.
Select your main artwork layer.
Grab the Magic Wand Tool (W) and click anywhere inside the new empty border to select it.
The Pro-Trick: Go to the top menu and click Select > Modify > Expand.
Type in 1 or 2 pixels and click OK.
Note: This makes your selection bite just slightly into your original artwork, which prevents any ugly white hairlines from showing up on the final seam.
Step 3: Run Content-Aware Fill
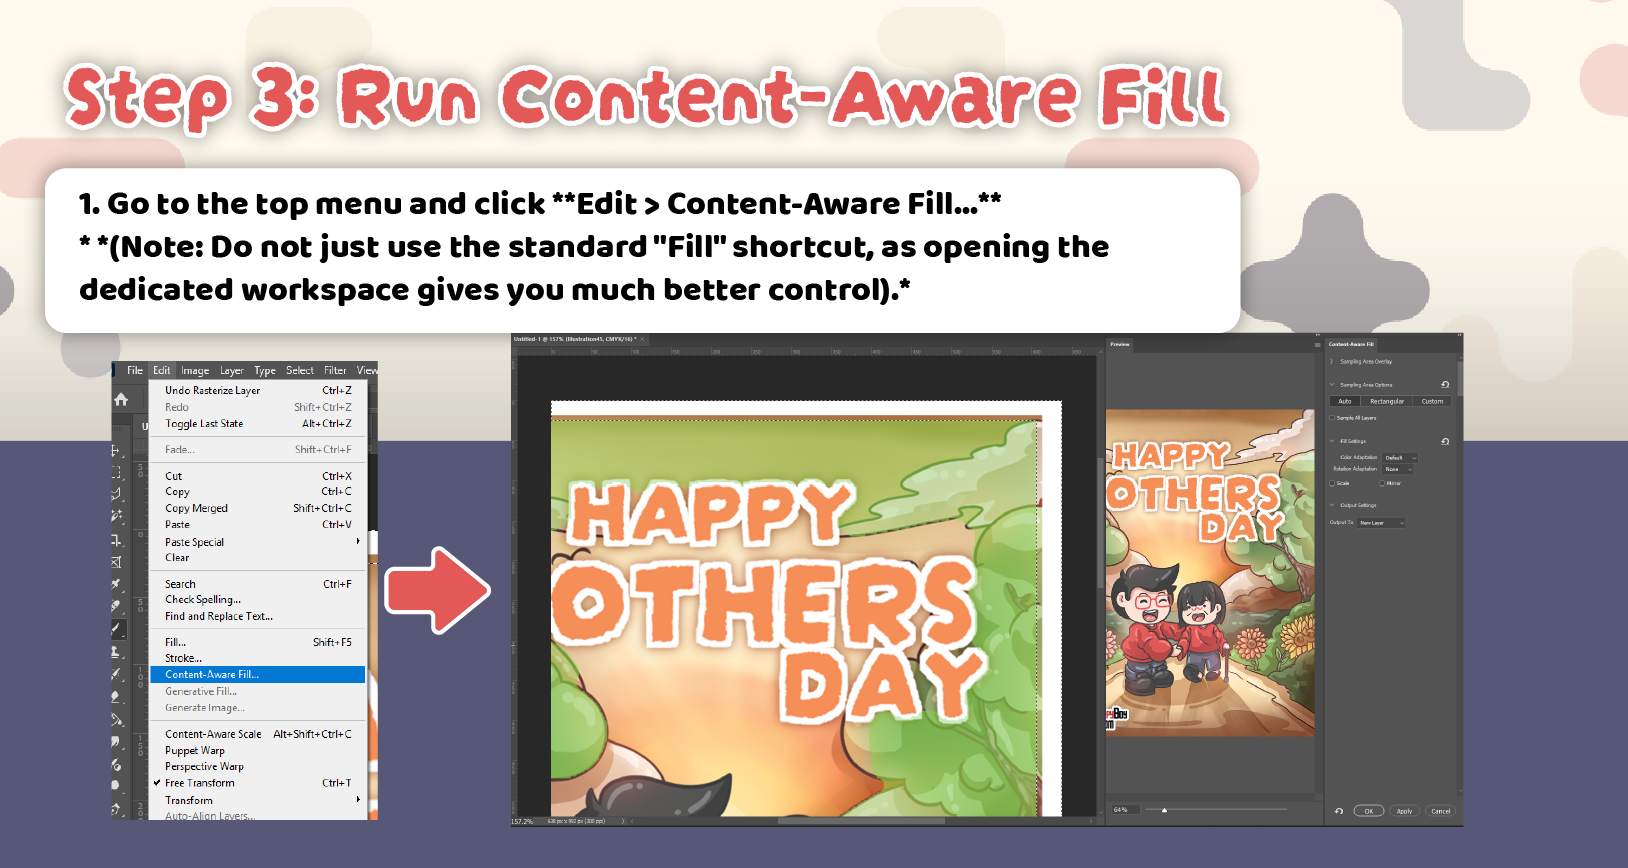
Now we will tell Photoshop to clone and stretch your edges into the empty space.
Go to the top menu and click Edit > Content-Aware Fill….
Note: Do not just use the standard “Fill” shortcut, as opening the dedicated workspace gives you much better control.
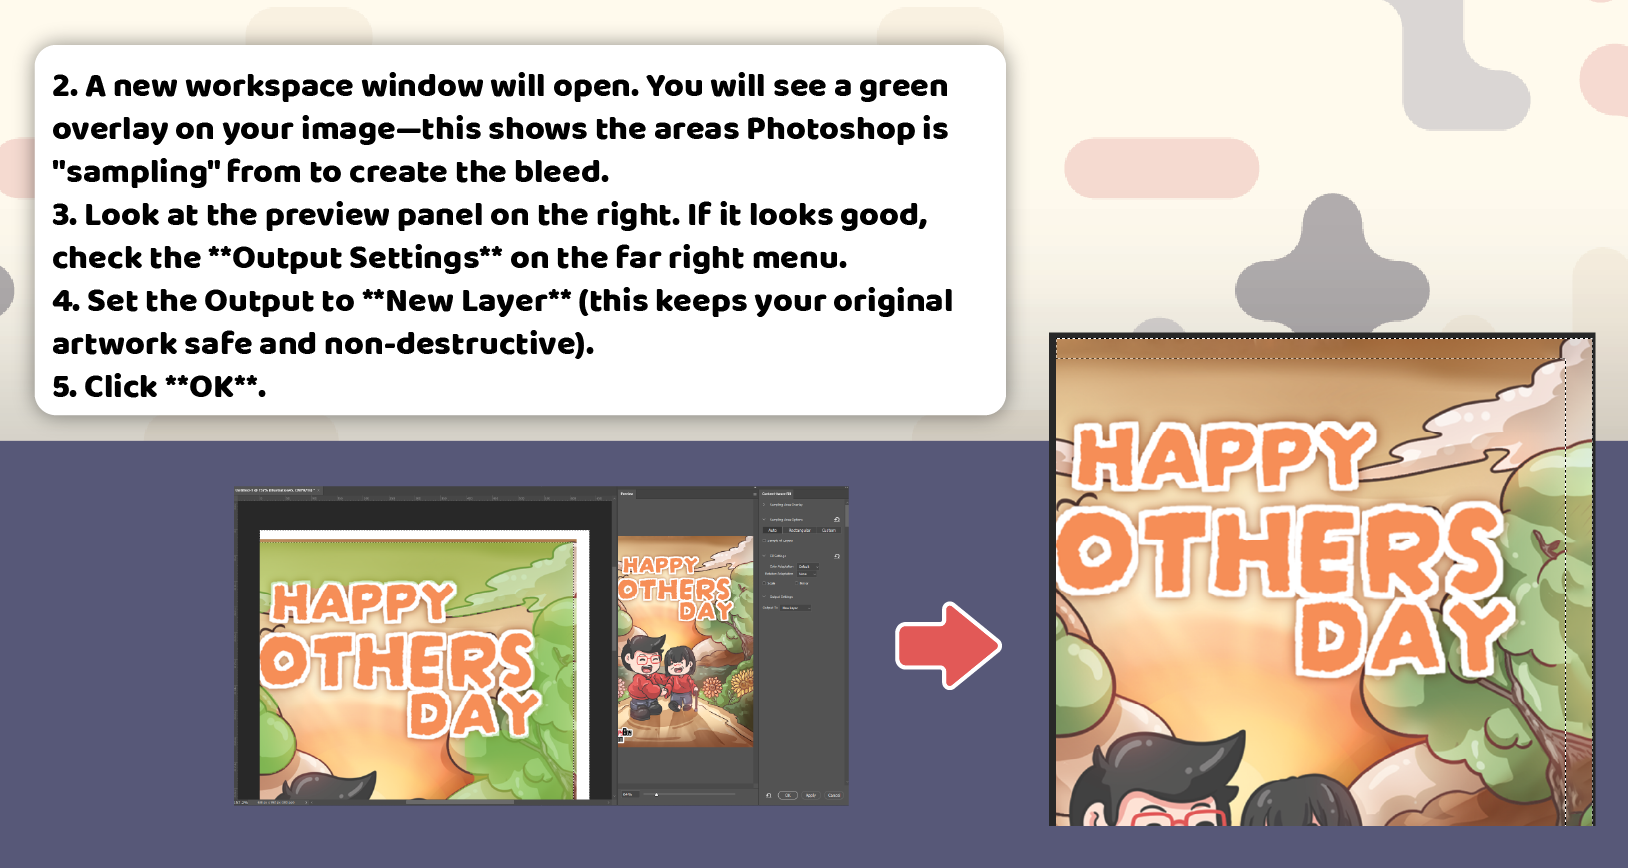
A new workspace window will open. You will see a green overlay on your image—this shows the areas Photoshop is “sampling” from to create the bleed.
Look at the preview panel on the right. If it looks good, check the Output Settings on the far right menu.
Set the Output to New Layer (this keeps your original artwork safe and non-destructive).
Click OK.
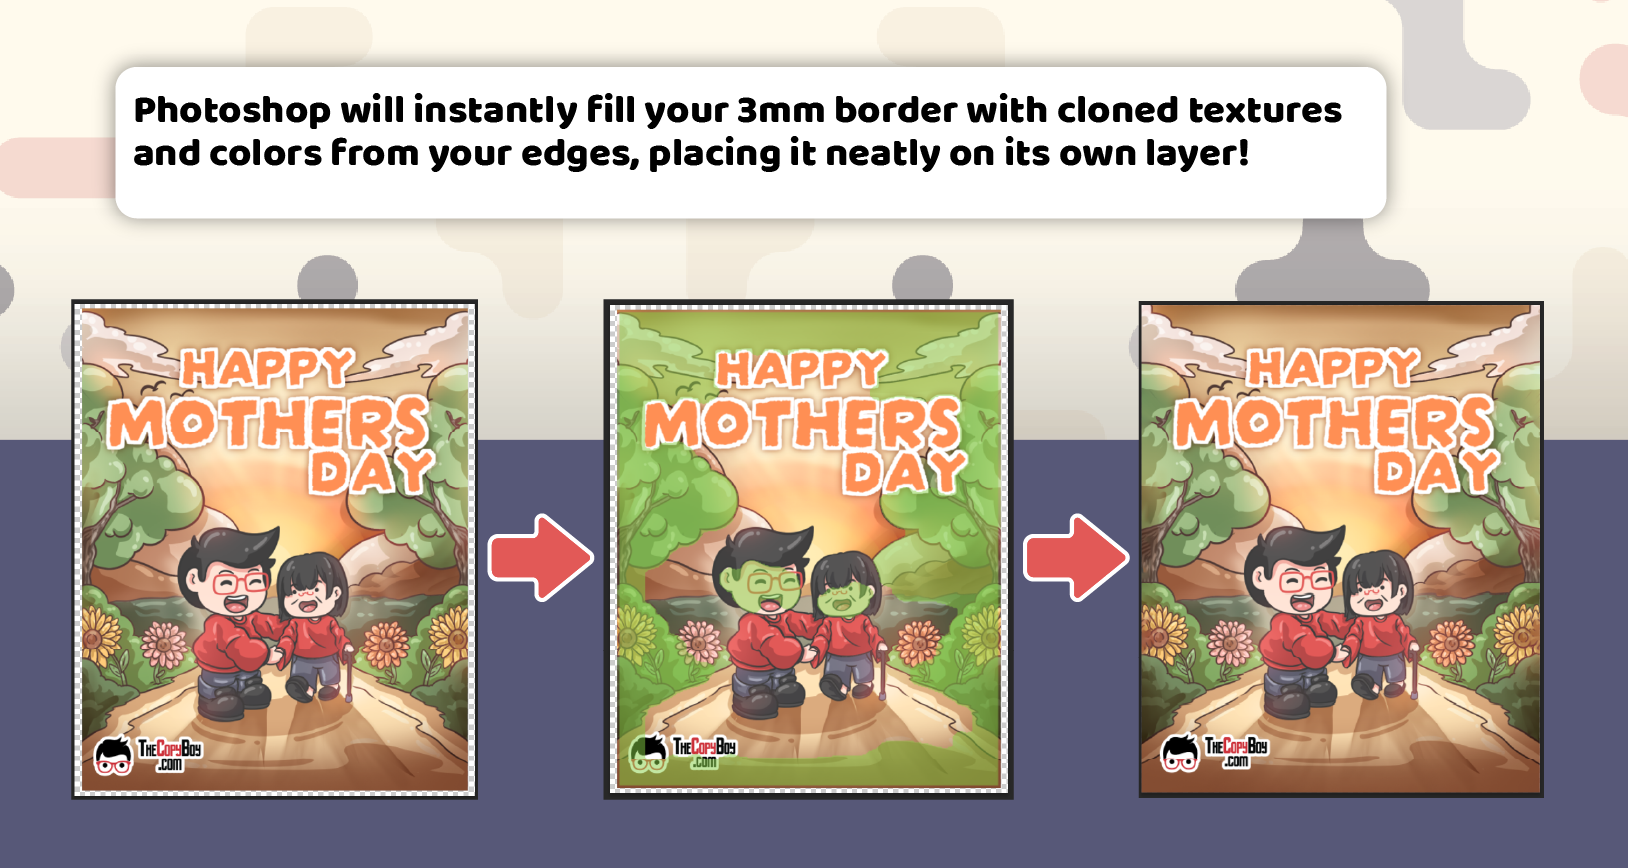
And you are done! Photoshop will instantly fill your 3mm border with cloned textures and colors from your edges, placing it neatly on its own layer.
Before You Export: Check Your Ink Coverage
Bleed sorts out the edges. Color mode and ink coverage sort out everything inside them.
Set the file to CMYK under Image > Mode > CMYK Color. Then open the Info panel, set one readout to Total Ink, and hover over your darkest areas. We work to a maximum of 240% total ink coverage. Anything above that needs to come down before you send the file, or it will print muddy instead of rich. More on this in our RGB vs CMYK guide.