
A cut line tells us exactly where your sticker should be cut. For custom-shaped or die-cut stickers, the cut line should follow the outside shape of your artwork and form one clean, closed outline.
For the best result, we also recommend creating a white border around your artwork and smoothing the shape before creating the final cut line. This helps remove very sharp corners and small details, making the sticker easier and cleaner to cut.
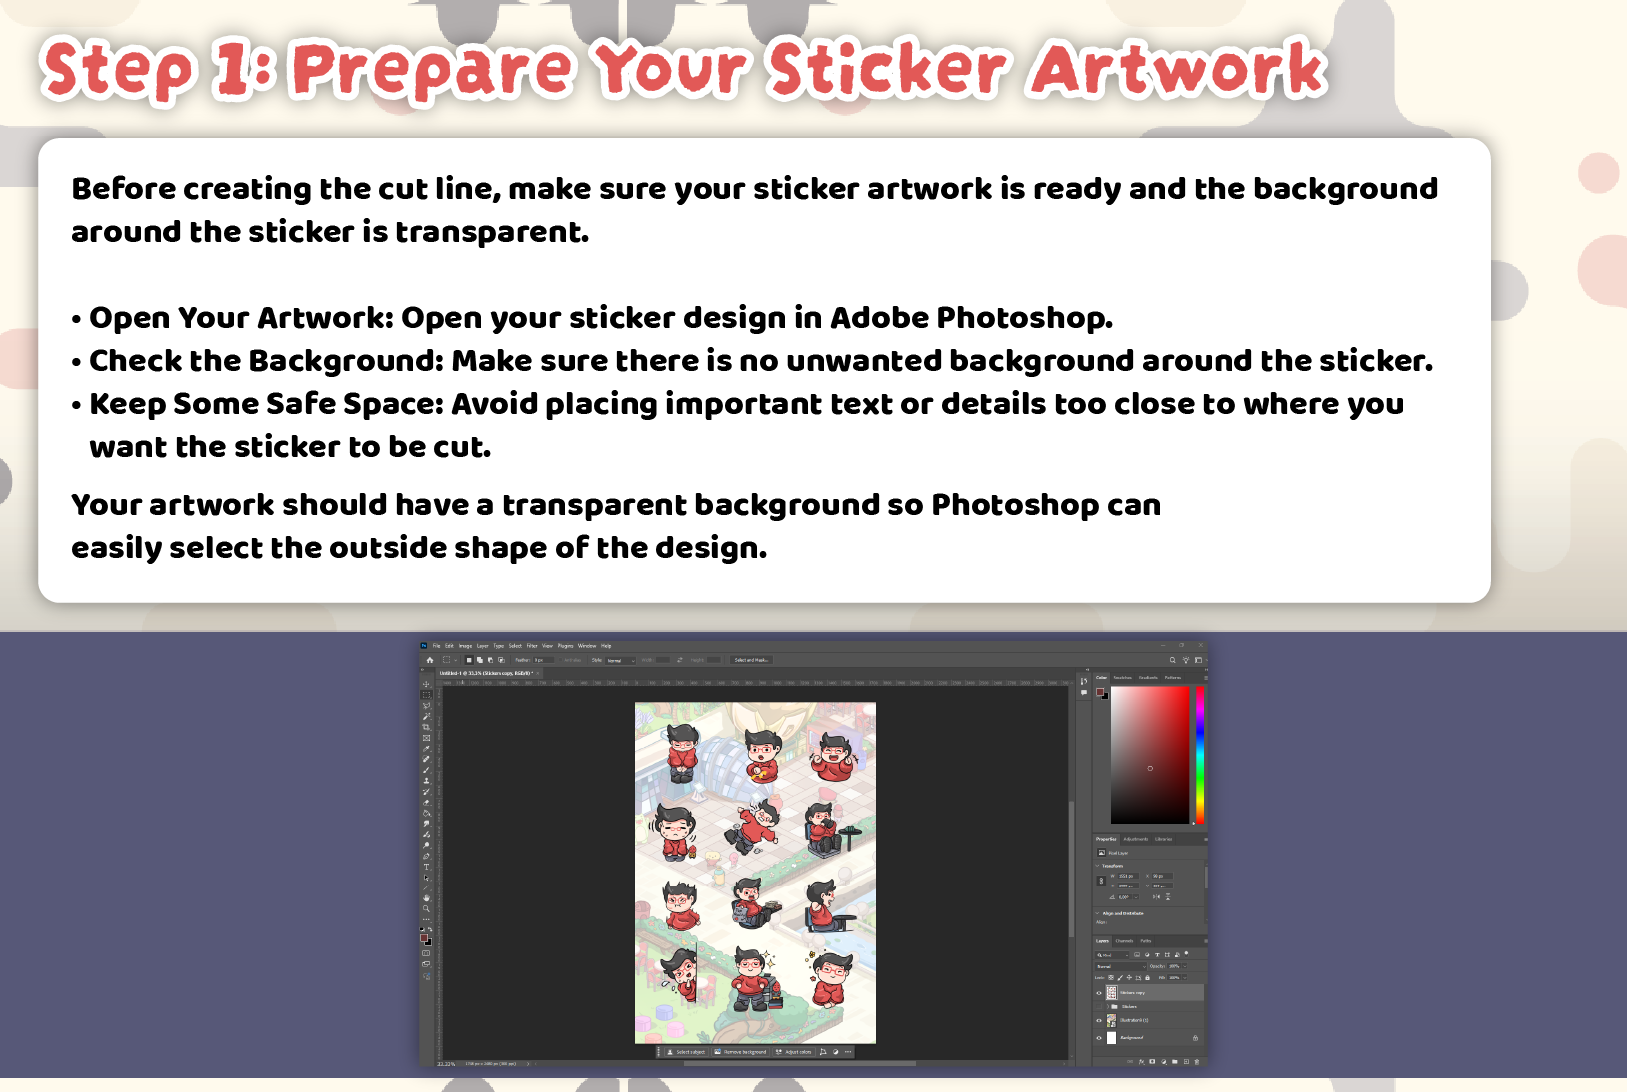
Step 1: Prepare Your Sticker Artwork
Before creating the cut line,
make sure your sticker artwork is ready and the background around the sticker is transparent.
- Open Your Artwork: Open your sticker design in Adobe Photoshop.
- Check the Background: Make sure there is no unwanted background around the sticker.
- Keep Some Safe Space: Avoid placing important text or details too close to where you want the sticker to be cut.
Your artwork should have a transparent background so
Photoshop can easily select the outside shape of the design.
Step 2: Select the Shape of Your Sticker
Photoshop can use the shape of your artwork to create the starting point for your sticker border and cut line.
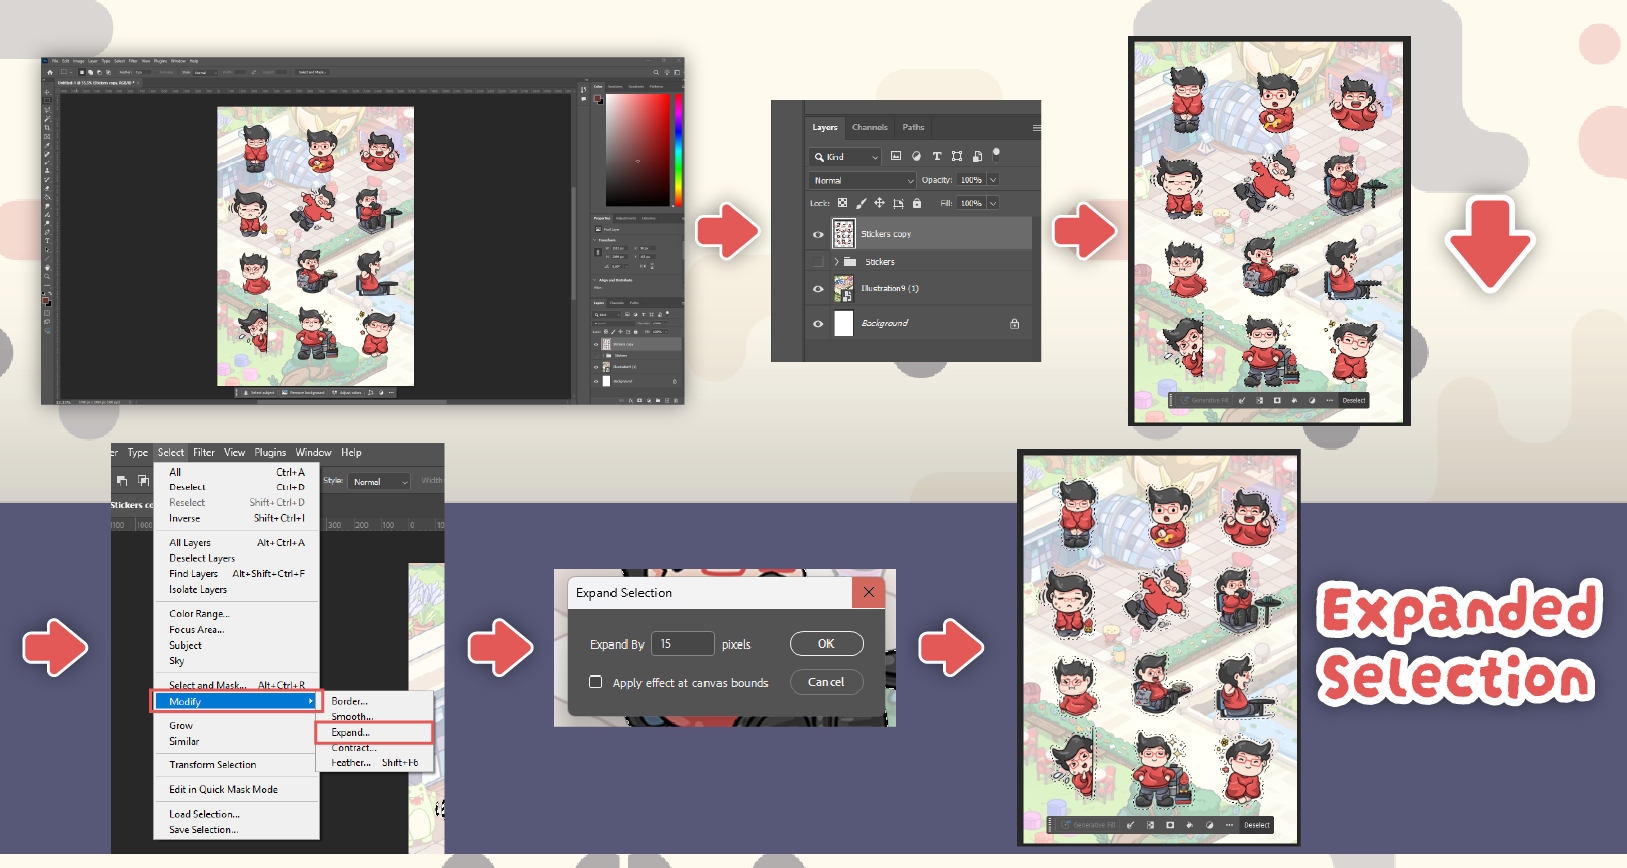
- Select Your Artwork: Hold Ctrl (Windows) / Command (Mac) and click the thumbnail of your artwork layer in the Layers panel.
- Check the Selection: You should see a dotted selection line following the outside shape of your artwork.
- Expand the Selection: Go to Select → Modify → Expand and increase the selection to create some space around your artwork.
For most stickers, we recommend leaving approximately 2–3mm of space
between the artwork and the cutting edge.
Step 3: Smooth the Selection
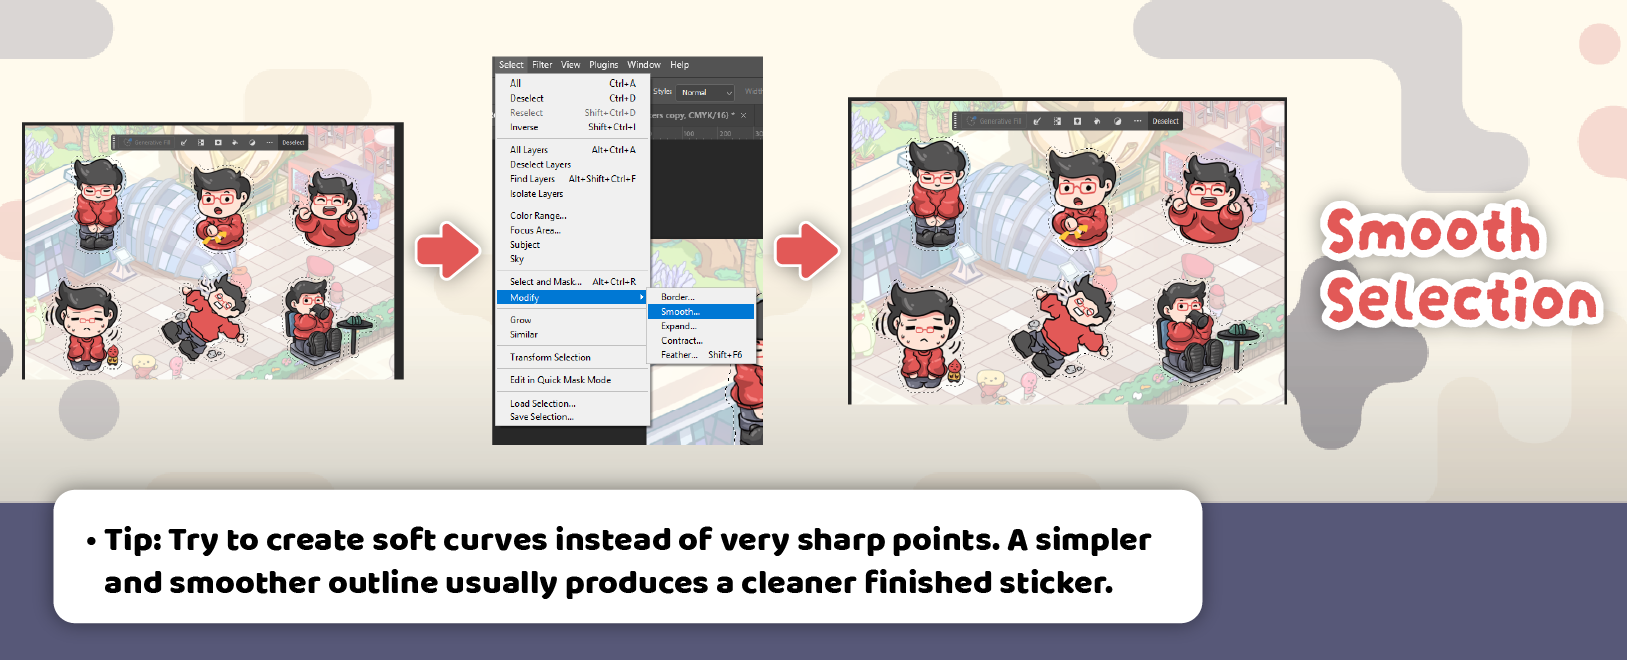
After expanding the selection, you may notice that Photoshop follows every small detail of your artwork. This can create unnecessary sharp corners, small bumps or complicated cutting areas.
To make the sticker easier to cut, we recommend smoothing the selection.
- Smooth the Selection: Go to Select → Modify → Smooth.
- Adjust the Amount: Increase the smoothing amount until the small sharp corners and unnecessary details become more rounded.
- Check the Shape: Make sure the selection still follows the overall shape of your artwork without cutting into important parts.
The amount of smoothing required will depend on the size and resolution of your artwork, so adjust it until you get a clean and natural-looking outline.
Tip: Try to create soft curves instead of very sharp points. A simpler and smoother outline usually produces a cleaner finished sticker.
Step 4: Create the White Sticker Border
Once your selection has been expanded and smoothed, you can use it to create the white border around your sticker.
This white area will be part of the printed sticker and creates some space between your artwork and the cutting edge.
- Create a New Layer: Add a new layer underneath your sticker artwork.
- Keep the Selection Active: Make sure your expanded and smoothed selection is still selected.
- Fill the Selection with White: Fill the selected area with white.
- Move the Layer Below Your Artwork: Make sure the white layer sits behind your original sticker design.
You should now have a clean white border surrounding your artwork.
The white border also helps simplify complicated artwork shapes. Instead of the cutting machine following every tiny detail, the sticker can be cut around the smoother outside border.
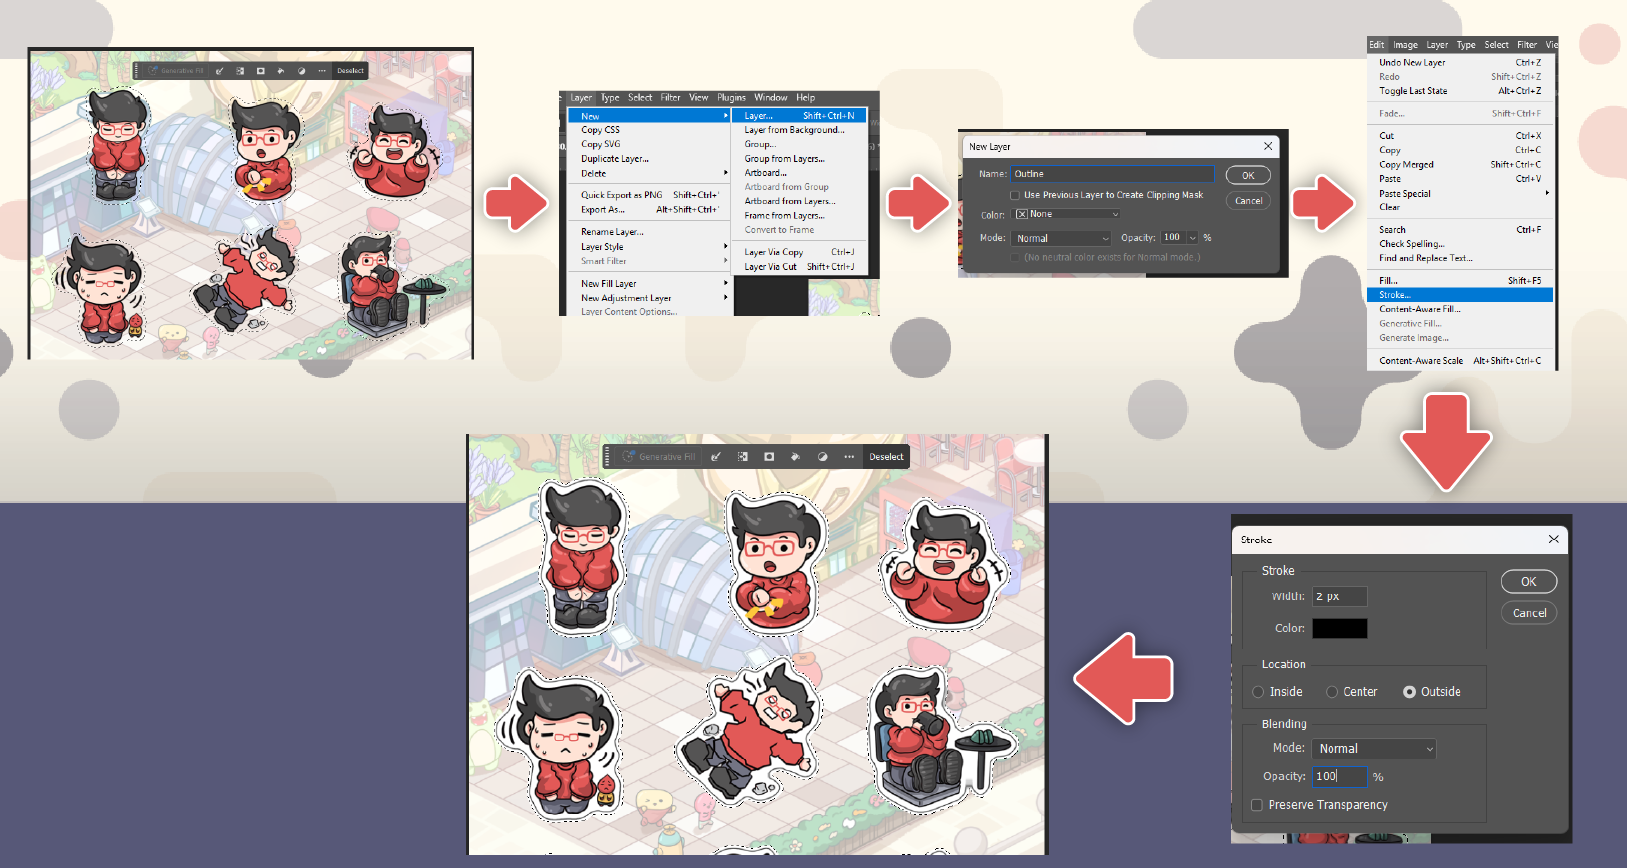
Step 5: Create the Cut Line
The final cut line should follow the outside edge of the white sticker border, rather than following every small detail of the original artwork.
- Select the White Border: Hold Ctrl (Windows) / Command (Mac) and click the thumbnail of your white border layer.
- Create a New Layer: Add a new layer above your artwork and name it “Cut Line.”
- Add the Outline: With the selection active, go to Edit → Stroke and apply a thin, clearly visible line.
- Check the Shape: Make sure the cut line completely surrounds the sticker and forms one closed shape.
We recommend using a bright colour such as
Magenta for the cut line so our printing team can easily identify it.
The cut line should be a single, smooth and closed outline wherever possible.
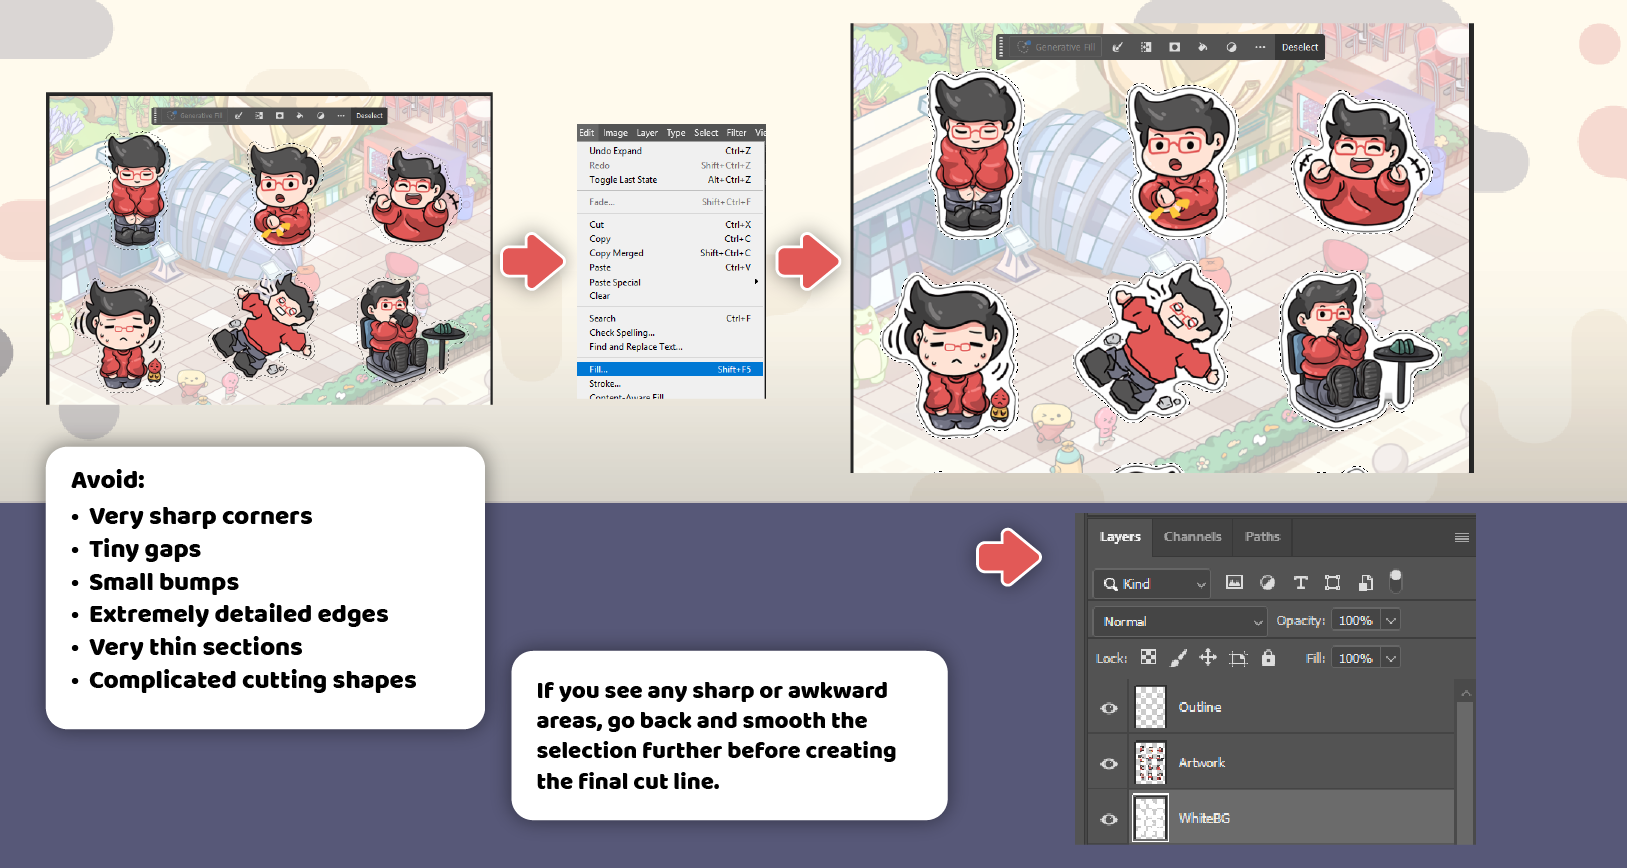
Avoid:
- Very sharp corners
- Tiny gaps
- Small bumps
- Extremely detailed edges
- Very thin sections
- Complicated cutting shapes
If you see any sharp or awkward areas, go back and smooth the selection further
before creating the final cut line.
Step 6: Check and Save Your Artwork
Before saving your file, check that your artwork contains three clear parts:
- Your Original Artwork
- The White Sticker Border
- The Cut Line
Keep each part on a separate layer whenever possible.
- Keep the Cut Line Separate: Do not merge the Cut Line layer with your sticker artwork.
- Name Your Layers Clearly: For example, “Artwork,” “White Border,” and “Cut Line.”
- Check the Cut Line: Make sure it is smooth, closed and does not contain unnecessary sharp corners.
- Save Your File: We recommend saving your working artwork as a PSD so the layers remain editable.
One More Thing: White Border vs Cut Line
The white border and cut line are two different things.
The white border is part of your printed sticker. It creates the visible white space around your artwork and helps produce a cleaner sticker shape.
The cut line is only a guide for our cutting machine. It tells us where the sticker should be cut and is not intended to be printed on the finished sticker.
For the best cutting results, keep the final shape simple, smooth and rounded. Very detailed edges, tiny gaps and extremely sharp corners may need to be adjusted before production.
If you are familiar with Adobe Illustrator, we recommend creating the final cut line there as a vector path, as vector cut lines provide cleaner and more accurate information for professional sticker cutting.