

Step 1: Turn on the Bleed Guide
Canva handles the math for you so you do not need to manually enter bleed dimensions; it defaults to the industry standard of 0.125 inches (or 3mm). You simply need to make the guide visible.
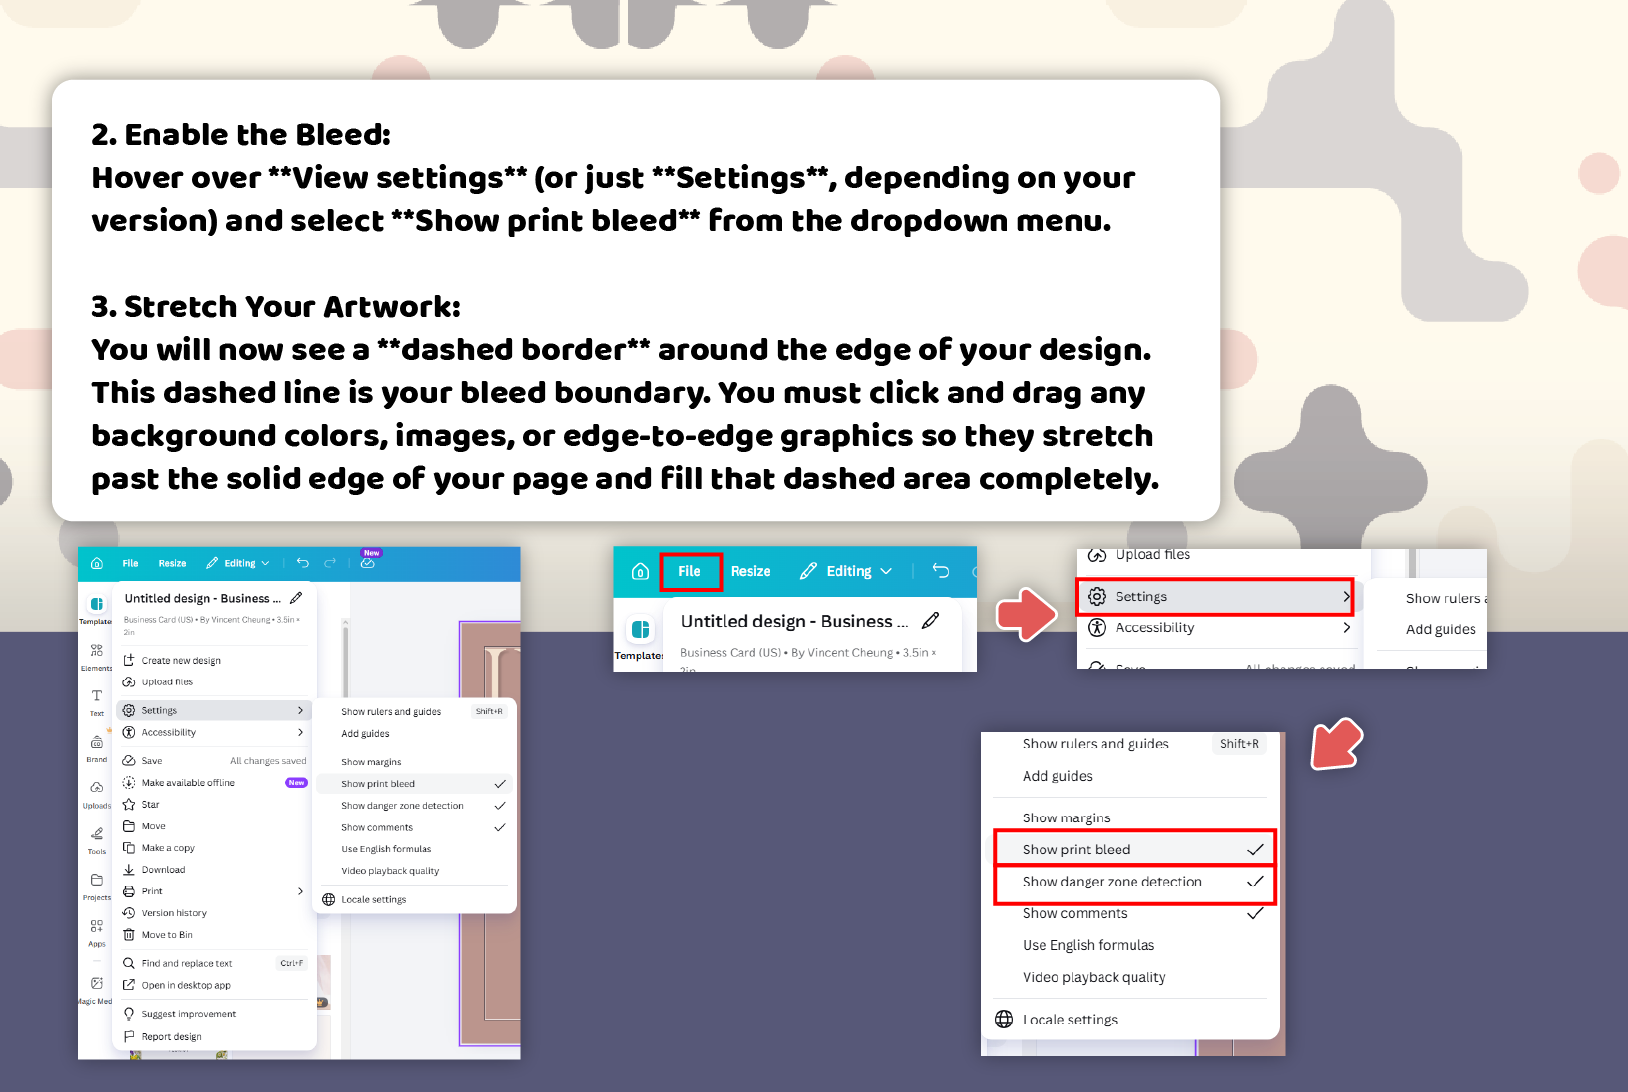
Open Settings: Inside your Canva design, go to the top menu bar and click File.
Enable the Bleed: Hover over View settings (or just Settings, depending on your version) and select Show print bleed from the dropdown menu.
Stretch Your Artwork: You will now see a dashed border around the edge of your design. This dashed line is your bleed boundary. You must click and drag any background colors, images, or edge-to-edge graphics so they stretch past the solid edge of your page and fill that dashed area completely.
Step 2: Export Your Print-Ready PDF
Having the bleed visible on your screen does not help the print shop unless you export the file with that extra data included.
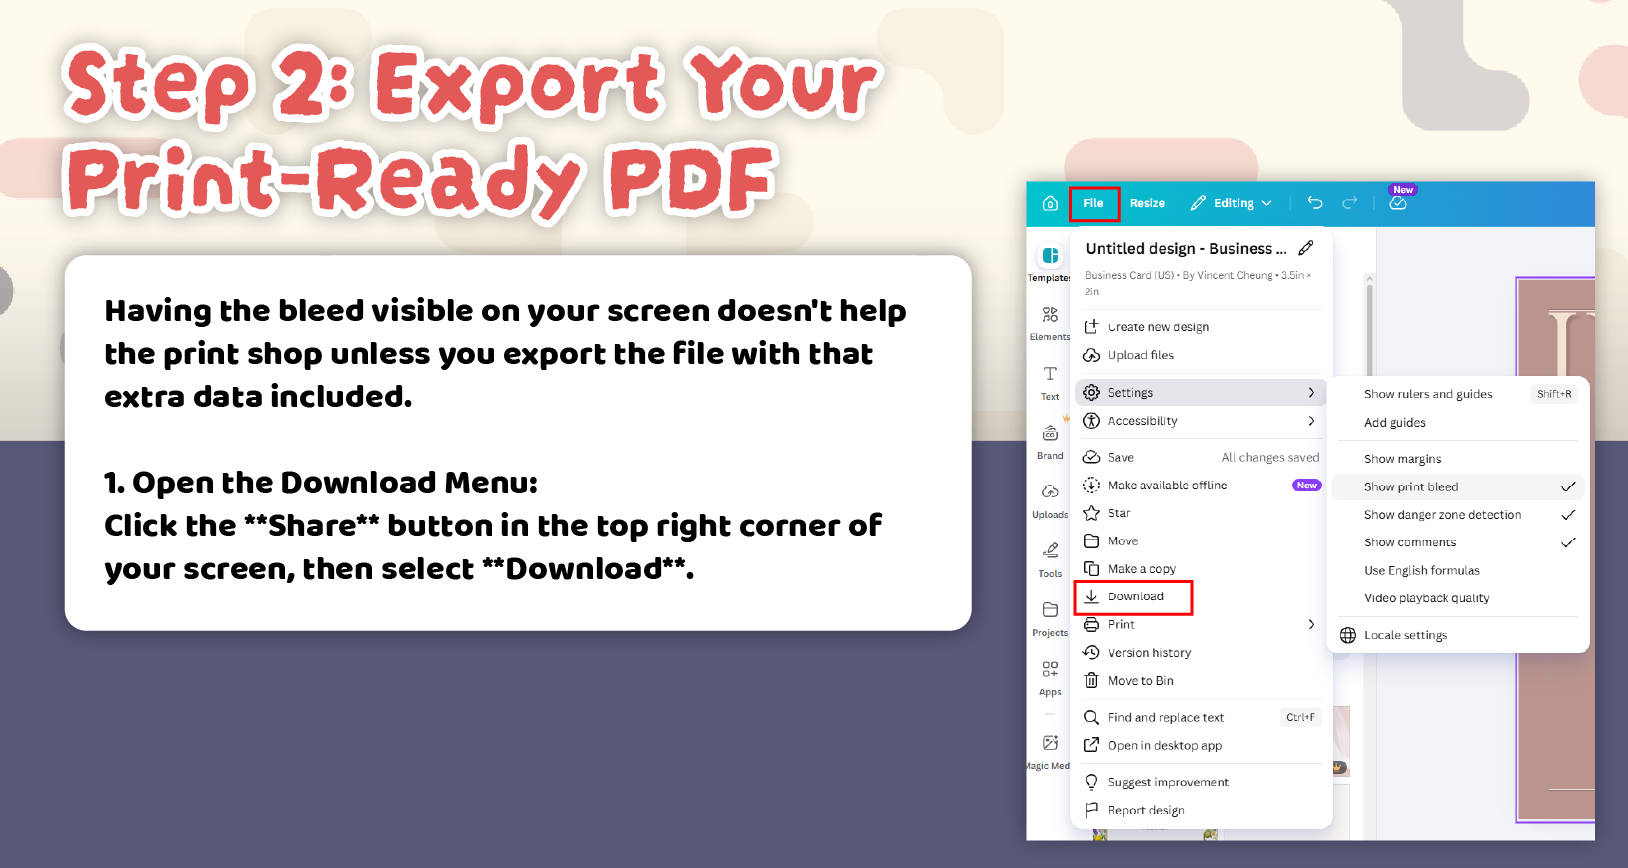
Open the Download Menu: Click the Share button in the top right corner of your screen, then select Download.
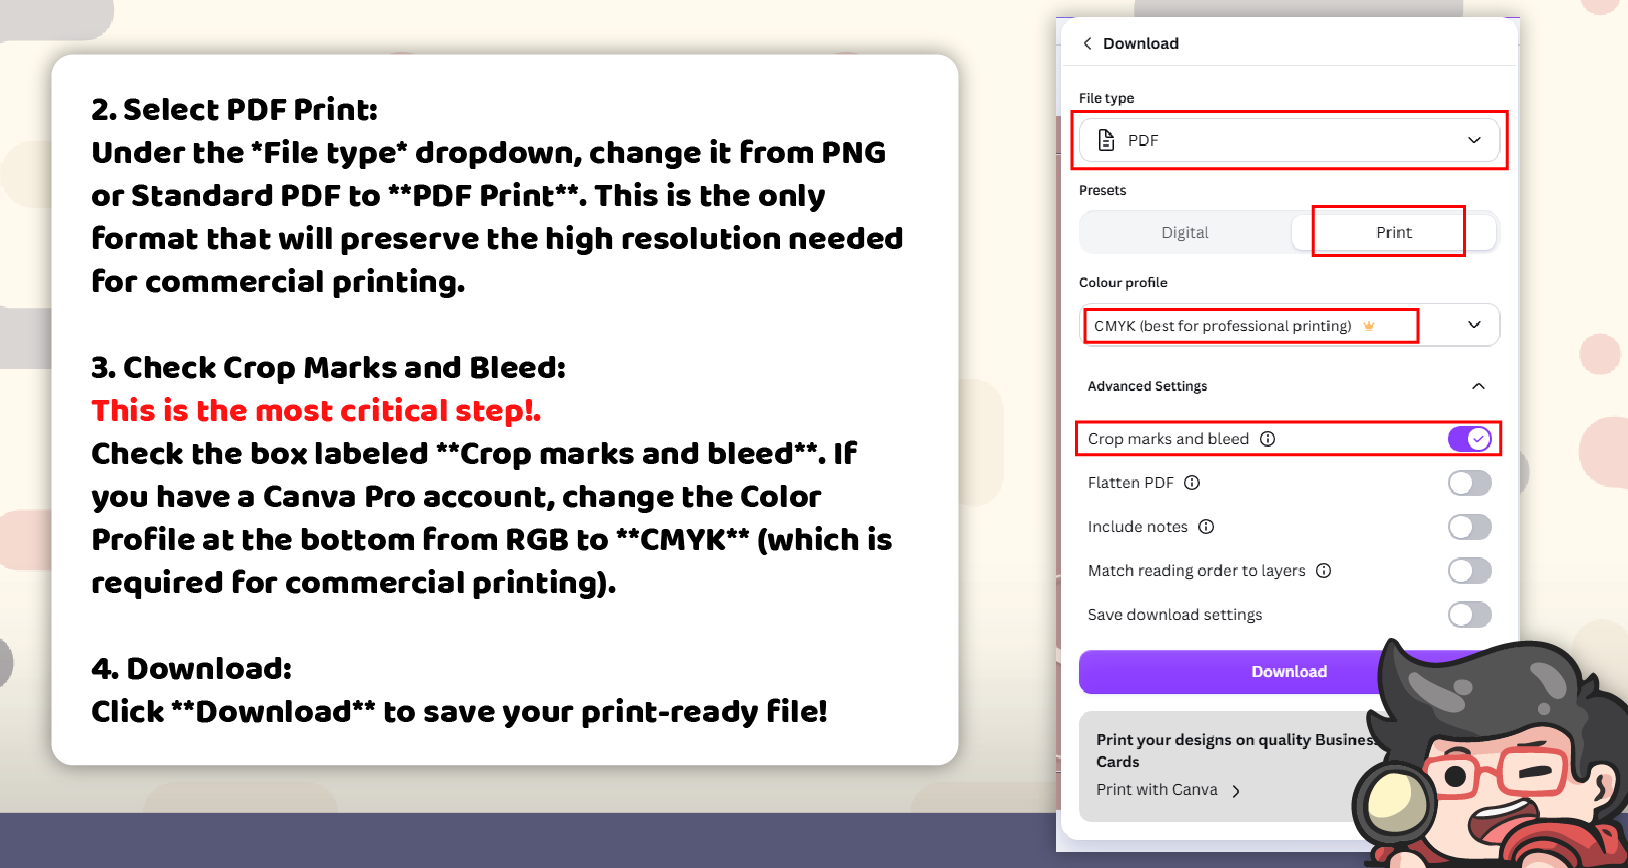
Select PDF Print: Under the File type dropdown, change it from PNG or Standard PDF to PDF Print. This is the only format that will preserve the high resolution needed for commercial printing.
Check Crop Marks and Bleed: This is the most critical step. Check the box labeled Crop marks and bleed. If you have a Canva Pro account, change the Color Profile at the bottom from RGB to CMYK (which is required for commercial printing).
Download: Click Download to save your print-ready file.
One More Thing: Color and Ink Coverage
Canva designs in RGB. On a paid plan the PDF Print export can convert to CMYK on the way out, but you still cannot set individual ink values or check total ink coverage inside Canva.
For most jobs that is fine. Just know two things. Strong neon colors come back duller in print than they look on screen, because no ink can reproduce them. And very dark blacks built in Canva can carry more ink than you expect. We work to a maximum of 240% total ink coverage. If the color is critical to the job, have the file built in Illustrator or InDesign instead, or check with your design studio. Our RGB vs CMYK guide explains why.