Follow these simple steps to set up your business card design files perfectly for hot foil stamping:
Plan Your Design
Decide exactly which elements of your business card (like text, logos, or character art) you want to feature the hot stamp effect.
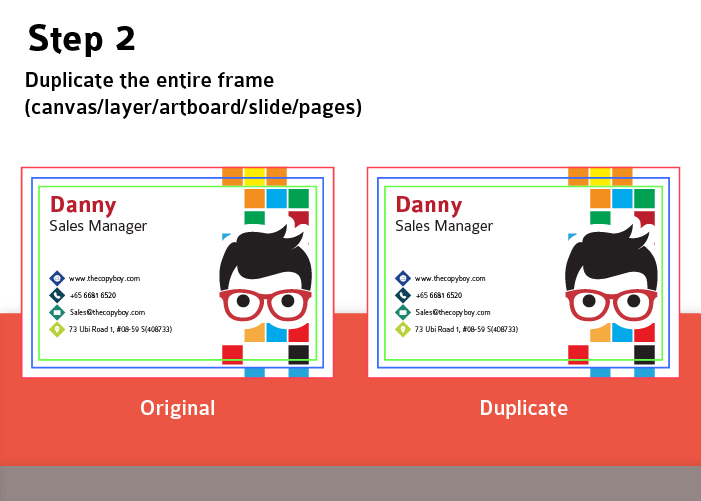
Duplicate Your Workspace
Create an exact copy of your entire design frame—whether that’s a canvas, layer, artboard, or page. You should now have an “Original” and a “Duplicate” version.
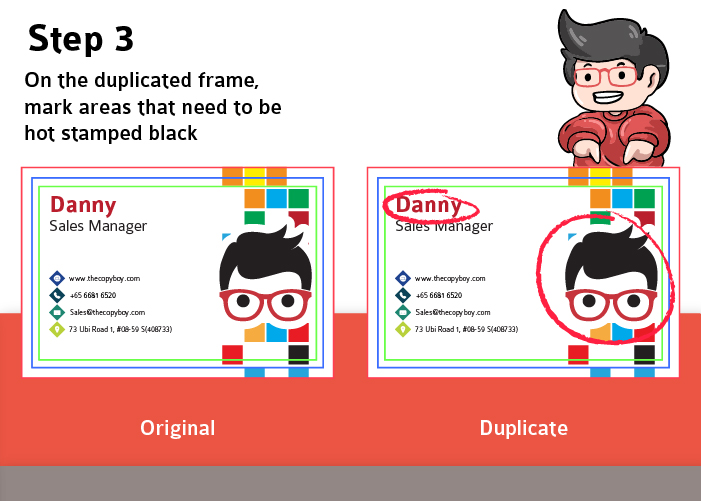
Isolate the Hot Stamp Areas
On your Duplicate file, identify the specific areas you want hot stamped. These elements need to be set to solid black.
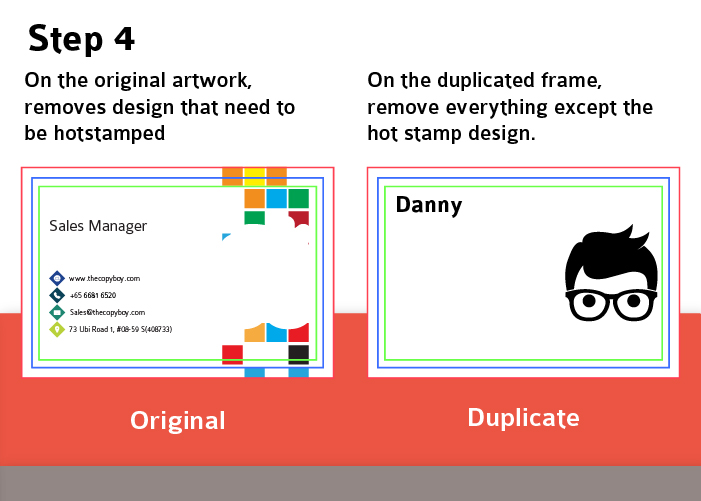
Separate the Artworks
Now, you need to divide your design into two distinct files:
On the Original (Print Artwork): Delete the elements that will be hot stamped. This file should only contain the standard printed ink and background.
On the Duplicate (Hot Stamp Artwork): Delete everything except the solid black elements you want hot stamped. The rest of the canvas should be completely blank.
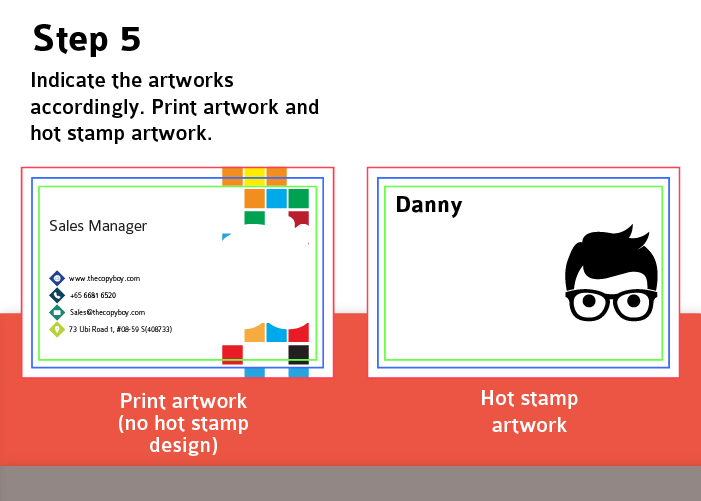
Label and Export
Clearly name your files so the printing team knows which is which (e.g., “Print_Artwork” and “Hot_Stamp_Artwork”).
The Final Result
The printer will use your standard print artwork for the base design, and use your black “Hot Stamp Artwork” as a precise template to press the metallic foil over the exact spots you chose!