How To Set Your UV Layer or Print in Adobe Illustrator
Adding a Spot UV effect or 3D texture to your prints can significantly elevate your designs. Here is a straightforward, step-by-step guide to setting up your files correctly in Adobe Illustrator.
Identify and Prepare
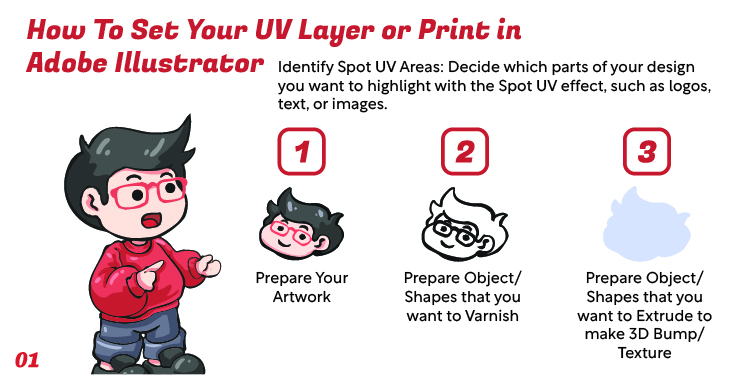
Identify Spot UV Areas: Decide which parts of your design you want to highlight with the Spot UV effect, such as logos, text, or images.
Prepare Your Artwork: Ensure your main base artwork is fully designed and ready.
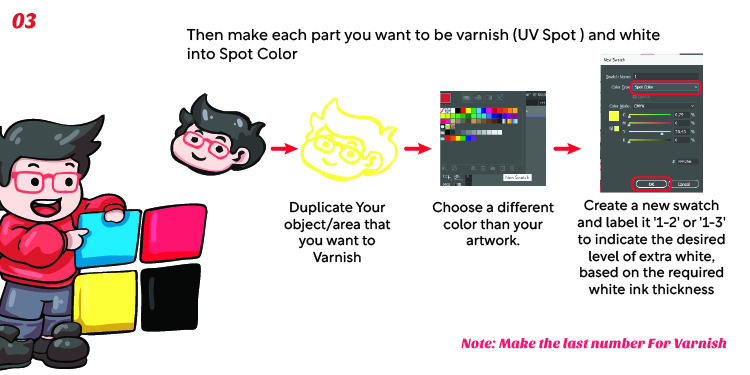
Target Varnish Areas: Prepare the specific objects or shapes that you want to apply the varnish to.
Target 3D Textures: Prepare the objects or shapes that you want to extrude to make a 3D bump or texture.
Duplicate and Align
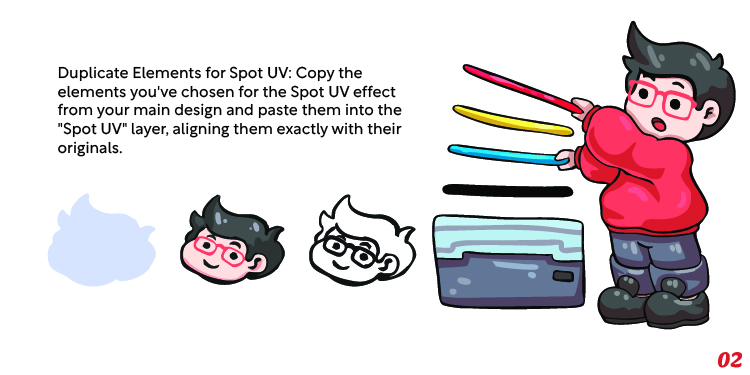
Duplicate Elements for Spot UV: Copy the specific elements you have chosen for the Spot UV effect from your main design.
Paste and Align: Paste these copied elements into a designated “Spot UV” layer, taking care to align them exactly with their originals in the main design.
Understand Layer Stacking
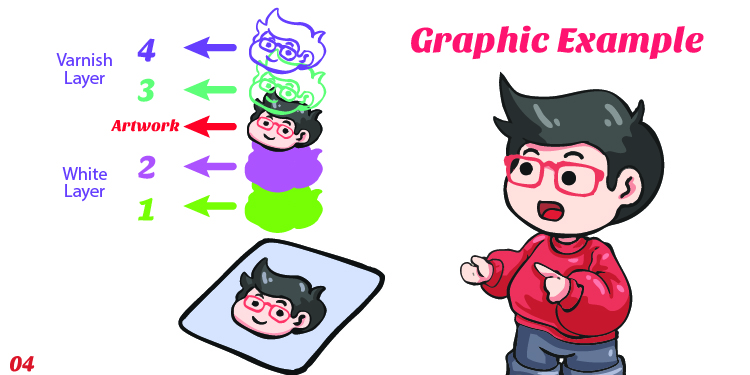
It is crucial to organize your layers properly to ensure the printer reads the effects in the correct order.
As shown in the graphic example, base foundation layers (labeled 1, 2, and 3) should stack below your main “Artwork” layer, while top-level effects (labeled 4) sit above the artwork.
Duplicate and Align
Duplicate Elements for Spot UV: Copy the specific elements you have chosen for the Spot UV effect from your main design.
Paste and Align: Paste these copied elements into a designated “Spot UV” layer, taking care to align them exactly with their originals in the main design.